คน
{{จำนวน}}+ ภาพ


ACworks เป็นบริษัทที่ให้บริการดาวน์โหลดสื่อฟรีโดยอิงจากการส่งแบบมืออาชีพและรวมกับการส่งของครีเอเตอร์ยอดนิยม ต้องขอบคุณคุณสมบัติเฉพาะของแหล่งที่มาของเนื้อหานี้ใน illustAC-calligraphy ปัจจุบันในหน้าหมวดหมู่ คุณจะสามารถค้นหาเนื้อหาที่มีสไตล์แตกต่างจากไลบรารีสื่ออื่นๆ ได้
บทความนี้จะให้การแนะนำที่ครอบคลุมเกี่ยวกับสื่อการประดิษฐ์ตัวอักษรใน illustAC จากมุมมองต่อไปนี้
เมื่อพูดถึงการคัดลายมือ ปกติต้องพูดถึงตัวอักษรญี่ปุ่น อักขระญี่ปุ่นประกอบด้วยตัวอักษรจีนและคะนะเป็นหลัก สำหรับคนจีน ตัวอักษรจีนจะเขียนง่าย รู้ไว้ ถ้าไม่ใช่นักปราชญ์ คนธรรมดาจะแยกแยะความแตกต่างระหว่างอักษรจีนญี่ปุ่นกับอักษรจีนตัวเต็มได้ยากจริงๆ แต่สำหรับคะนะ คุณอาจเข้าใจคำว่า ”の” การใช้อนุภาคได้ ขีด จำกัด โชคดีที่เนื่องจากความคล้ายคลึงกันสูงในเทศกาลดั้งเดิมในวงวัฒนธรรม Dongjia เดียวกันนักออกแบบชาวไต้หวันสามารถค้นหาวัสดุที่มีค่ามากมายแม้แต่ในภาษาญี่ปุ่น โดยทั่วไป ตัวอย่างนี้เป็นข้อความปีใหม่ "ขอแสดงความยินดีกับปีใหม่ " หรือเทศกาลแห่งความรักแบบดั้งเดิม " วันวาเลนไทน์จีน (ถึงแม้ความหมายจะไม่เหมือนกันก็ตาม)" พูดง่ายๆ ก็คือ หากผู้ออกแบบต้องการหาของที่มีสไตล์ญี่ปุ่นดั้งเดิมแรงๆ แต่ในขณะเดียวกัน หากคุณมีภาพประกอบฟรีที่เป็นที่รู้จักมากขึ้น วัสดุประเภทการประดิษฐ์ตัวอักษรเป็นตัวเลือกที่ดีที่สุดของคุณ
แน่นอนว่าในหมวดหมู่การประดิษฐ์ตัวอักษรของ illustAC เนื้อหาบางส่วนไม่เกี่ยวข้องกับข้อความ มันกินพื้นที่ครึ่งของประเทศ นอกจากนี้ยังมีภาพประกอบประเภทอื่น : วัสดุหมึกและล้าง พวกเขาสามารถปรากฏเป็นภาพที่เป็นรูปธรรม (เช่นภาพนักษัตร) หรือเป็นวัสดุตกแต่ง (เช่นเส้นขอบ) แม้ว่าจะไม่ได้เขียนคำ แต่ผู้ชมยังสามารถเห็นฉันรู้สึกถึงวัฒนธรรมที่แข็งแกร่ง มรดกในสไตล์ นี่อาจเป็นภาพสะท้อนที่มีเงื่อนไขเฉพาะของวงกลมวัฒนธรรมเอเชียตะวันออก ยิ่งไปกว่านั้น ผู้สร้างได้รวมวัสดุสองประเภทข้างต้นเพื่อสร้าง มีอักษรอียิปต์โบราณประเภทที่สามคือ ข้อความสร้างสรรค์ที่กล่าวถึงในที่นี้ไม่ใช่ต้นฉบับทั้งหมดตั้งแต่เริ่มต้นแต่หมายถึงการเสียรูปของลายเส้นตามความหมายของข้อความโดยไม่เปลี่ยนแอตทริบิวต์ดั้งเดิมของข้อความเพื่อให้ดูเหมือนกับการออกแบบภาพวาดมากขึ้น ตัวอย่างเช่น แปลงคำอวยพรให้เป็น "ความปรารถนา" ให้กลายเป็นคนใหม่ที่จับมือกัน หรือแสดง "การเดินทาง" ที่ผูกมัดเป็นริบบิ้นยาว การออกแบบสามารถกล่าวได้ว่าเป็นแบบจำลองในหมู่พวกเขา
เพื่อให้ได้ภาพประกอบ/เวกเตอร์ปลอดค่าลิขสิทธิ์มากขึ้นในหมวดการประดิษฐ์ตัวอักษร คุณต้องค้นหาด้วยตัวเอง!
หากแยกความแตกต่างตามวัตถุประสงค์ในการใช้งาน วัสดุการประดิษฐ์ตัวอักษรใน illustAC สามารถแบ่งออกเป็นสองประเภทคร่าวๆ: รูปภาพองค์ประกอบ และรูปภาพ/เส้นขอบพื้นหลัง
แผนที่องค์ประกอบที่เรียกว่าจริง ๆ แล้วเป็นแพ็คเกจของวัสดุที่มีธีมเดียวกันและสไตล์เดียวกัน ด้วยวิธีการจัดเก็บไฟล์กราฟิกแบบเวกเตอร์ เช่น AI หรือ EPS รูปภาพเหล่านี้สามารถแยกออกเป็นองค์ประกอบต่างๆ เพื่อใช้งานจริงได้ ในขณะเดียวกัน เนื่องจากผู้ใช้มักใช้วัสดุเหล่านี้เพียงเล็กน้อยในการประมวลผลวัสดุดังกล่าว จึงไม่ง่ายที่จะชนกับการออกแบบของผู้อื่น อาจกล่าวได้ว่ารูปภาพประเภทนี้มีความยืดหยุ่นและสะดวกที่สุดในมือของนักออกแบบมืออาชีพ เมื่อเทียบกับหมวดหมู่อื่นๆ ไดอะแกรมองค์ประกอบในหมวดหมู่การประดิษฐ์ตัวอักษรมักจะปรากฏในรูปแบบของลายเส้นหรือวงกลม เมื่อเทียบกับรูปทรงเรขาคณิตที่เรียบร้อยและปกติ เส้นที่เกิดจากจังหวะเหล่านี้มีความชัดเจนและหนักกว่า
เมื่อพูดถึงภาพพื้นหลัง เป็นคำทั่วไปสำหรับวัสดุที่ใช้สำหรับรูปแบบพื้นหลังในการนำเสนอ หลายคนคิดว่าเนื้อหาเป็นหัวใจสำคัญของการนำเสนอ และการออกแบบเป็นเพียงการตกแต่ง การคิดแบบนี้ไม่มีวัตถุประสงค์ เพราะคุณค่าของการนำเสนอไม่ใช่การส่งข้อความ แต่เพื่อช่วยให้ผู้คนได้รับข้อความ การนำเสนอด้วยภาพที่สมเหตุสมผลสามารถดึงดูดความสนใจของผู้ชมได้นานกว่าเวอร์ชันขาวดำ เพื่อให้สามารถส่งข้อมูลได้มากขึ้น และการออกแบบเป็นอาวุธวิเศษที่เกี่ยวข้องกับประสิทธิภาพของกระบวนการนี้ แม้ว่าจำนวนจะน้อย แต่สิ่งที่คุณพบได้คือภาพวาดด้วยหมึกคุณภาพสูง หากคุณต้องการปรับปรุงพื้นผิวทางวัฒนธรรมของงานนำเสนอ เนื้อหาประเภทหมึกและล้างประเภทนี้คือสิ่งที่คุณไม่ควรพลาด
ใน illustAC คุณสามารถใช้วิธีการต่างๆ เพื่อค้นหาภาพประกอบ/เวกเตอร์การประดิษฐ์ตัวอักษรฟรีที่คุณต้องการได้อย่างรวดเร็ว
ค้นหาด้วยคำหลัก มันคือการค้นหา ฟังก์ชันที่มีอยู่ในแกลเลอรีใดก็ได้ (ยกเว้น templateAC) ใน illustAC ออบเจ็กต์การค้นหาคือป้ายกำกับทั้งหมดภายใต้ภาพประกอบการประดิษฐ์ตัวอักษร/กราฟิกเวกเตอร์ทั้งหมด! เนื่องจากผู้สร้างมักจะเพิ่มคำอธิบายประกอบ (แท็ก) ให้กับเนื้อหาของกราฟิกแบบเวกเตอร์เมื่อส่งบทความ วิธีการค้นหานี้สามารถรวมกราฟิกแบบเวกเตอร์ฟรีส่วนใหญ่ในลักษณะคลาสสิก และใช้เนื้อหาที่มีคำสำคัญ/คำในการค้นหาตามกราฟิกแบบเวกเตอร์ . ความถี่ถูกจัดเรียง หากคุณไม่ต้องการใช้การจัดอันดับความนิยมเริ่มต้น คุณสามารถลองใช้ฟังก์ชันการค้นหาถัดไป
นอกจากนี้ยังเนื่องมาจากลักษณะของการยอมรับการส่งจากผู้ใช้ทั่วไป ภาพประกอบ/วัสดุเวกเตอร์ฟรีของ illustAC อาจมีคุณภาพทุ่นที่ใหญ่กว่า ดังนั้น ภายใต้สถานการณ์ปกติ เราจึงเริ่มต้นแสดงผลการค้นหาตามความถี่ของการใช้ภาพประกอบ/กราฟิกแบบเวกเตอร์ แต่ถ้าคุณต้องการข้อมูลล่าสุด เราก็มีฟังก์ชันที่เกี่ยวข้องสำหรับคุณ เพียงตรวจสอบ [จัดเรียงตาม] - [ล่าสุด] ในแถบค้นหาที่ปรับแต่งแล้วที่ด้านข้างของหน้าเพื่อรับเนื้อหามือหนึ่งที่ผู้สร้างอัปโหลด!
เพื่อแสดงเนื้อหาในไลบรารีวัสดุให้มากที่สุด เราได้ผ่อนคลายความแม่นยำในการค้นหา นี่คือเหตุผลที่บางครั้งคุณเห็นสื่อต่างๆ เช่น “คน” หรือ “ผลไม้” ใต้หน้าค้นหาคำหลักของ “การประดิษฐ์ตัวอักษร” หากคุณไม่ชอบผลการค้นหาดังกล่าว คุณสามารถใช้ [ยกเว้นคำหลัก] ซึ่งอยู่ในแถบค้นหาที่ปรับปรุงแล้วเพื่อยกเว้นคำที่คุณไม่ต้องการดู ในสถานการณ์ข้างต้น ตราบใดที่คุณยกเว้นคำหลักของ "คน" และ "ผลไม้" คุณสามารถค้นหาวัสดุการประดิษฐ์ตัวอักษรได้อย่างแม่นยำยิ่งขึ้น ฟังก์ชันนี้รองรับการยกเว้นคำสำคัญ/คำหลายคำพร้อมกัน แต่อย่าลืมคั่นเวลาเหล่านี้ด้วยลูกน้ำ
โดยปกติ สีไม่เป็นประโยชน์สำหรับการค้นหากราฟิกแบบเวกเตอร์อย่างที่คิด วัตถุส่วนใหญ่ในสังคมมนุษย์สามารถย้อมสีได้ อย่างไรก็ตาม เมื่อค้นหาหมวดหมู่การประดิษฐ์ตัวอักษร ก็ยังไม่สมบูรณ์นัก (อาจกล่าวได้ว่ามีประโยชน์มาก) หลังจากที่ทุกส่วนของสีโค้ตอักษรวิจิตรได้รับการแก้ไขแล้ว ค้นหาตามสี คุณสามารถจำกัดช่วงการแสดงผลของผลการค้นหาได้อย่างง่ายดาย นอกจากนี้ คุณยังสามารถใช้ฟังก์ชันนี้เมื่อมองหาภาพประกอบอักษรวิจิตร/กราฟิกแบบเวกเตอร์ที่ตรงกับสีของบทความหรือเว็บไซต์
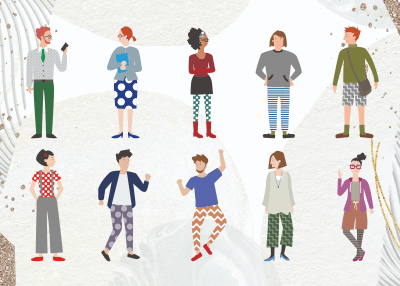
แม้ว่าผู้คนจะเป็นสมาชิกของการประดิษฐ์ตัวอักษรด้วย ใน illustAC ภาพประกอบ/เวกเตอร์ฟรีส่วนใหญ่ที่มีผู้คนเป็นเนื้อหาหลักจัดอยู่ในหมวดหมู่ “ภาพครอบครัว” ภายใต้การตั้งค่านี้ การพยายามค้นหาตามจำนวนคนในหมวดการประดิษฐ์ตัวอักษรเป็นเรื่องที่น่าเบื่อมาก แต่ไม่มีอะไรแน่นอน ตัวอย่างเช่น หากคุณต้องการค้นหาวัสดุคัดลายมือที่แสดงว่า "มนุษย์อาศัยอยู่อย่างกลมกลืนกับธรรมชาติ" คุณสามารถค้นหาโดยตั้งค่า [จำนวนรุ่น] เป็น 1 ในแถบค้นหาที่ปรับปรุงแล้ว ในขณะนี้ มีความเป็นไปได้สูงที่คุณจะเห็นภาพประกอบ/เวกเตอร์ที่มีผู้คนและการประดิษฐ์ตัวอักษรอยู่ร่วมกัน และอื่นๆ ในบางสถานการณ์ การค้นหาตามจำนวนคนสามารถช่วยให้คุณจำกัดขอบเขตการค้นหาของคุณให้แคบลงได้อย่างรวดเร็ว
การค้นหาภาพประกอบ/กราฟิกเวกเตอร์ที่คล้ายกันเป็นส่วนหนึ่งของการดำเนินการอัตโนมัติเมื่อค้นหาใน illustAC ฟังก์ชันนี้จะแบ่งออกเป็นสองประเภทตามอินเทอร์เฟซ
ต้องการแก้ไขกราฟิกแบบเวกเตอร์ แต่ไม่มีโปรแกรมแก้ไขรูปภาพในอุปกรณ์ของคุณใช่หรือไม่ รู้สึกว่าต้องดาวน์โหลดและนำเข้าเนื้อหาการประดิษฐ์ตัวอักษรที่พบระหว่างการแก้ไขก่อนที่จะแก้ไขเป็นปัญหาหรือไม่? ใน illustAC คุณจะไม่มีโอกาสประสบปัญหาดังกล่าว! สำหรับภาพประกอบ/ภาพเวกเตอร์แต่ละภาพ เราได้ตั้งค่าปุ่มแก้ไข แม้ว่าคุณจะไม่ได้เข้าสู่อินเทอร์เฟซดาวน์โหลดของแต่ละภาพ คุณสามารถคลิกปุ่มแก้ไขที่ปรากฏขึ้นเมื่อเคอร์เซอร์วางเมาส์เหนือภาพประกอบ/ภาพเวกเตอร์ และหลังจากเลือกขนาดที่คุณต้องการแก้ไขแล้ว คุณสามารถข้ามไปที่ ACworks ได้โดยอัตโนมัติ โปรแกรมแก้ไขรูปภาพฟรีAC (มีเวอร์ชันภาษาจีนดั้งเดิม) หลังจากการข้ามเสร็จสิ้น คุณไม่จำเป็นต้องดำเนินการใดๆ เพิ่มเติม วัสดุที่เลือกจะถูกโหลดโดยอัตโนมัติบนผืนผ้าใบเพื่อให้คุณแก้ไขได้โดยตรง ตั้งแต่การกลับด้าน/การจัดแนวของกราฟิกเวกเตอร์ การครอบตัดตามรูปร่าง และการเพิ่มข้อความ ไปจนถึงการวาดแผนภูมิและการแก้ไขร่วมกับหลายคน ฟังก์ชันที่จำเป็นทั้งหมดสำหรับการประมวลผลภาพมีให้ใช้งาน และที่สำคัญคือ ฟรี!
หากคุณชอบภาพประกอบ/กราฟิกแบบเวกเตอร์หรือกราฟิกแบบเวกเตอร์ในหมวดการประดิษฐ์ตัวอักษรในปัจจุบัน คุณสามารถดาวน์โหลดได้ฟรี เพื่อปรับให้เข้ากับวัตถุประสงค์ที่แตกต่างกัน เราได้เตรียมรูปแบบไฟล์ JPG, PNG และ AI/EPS ให้คุณเลือก ก่อนดาวน์โหลด คุณต้องลงทะเบียนและเข้าสู่ระบบบัญชีฟรีเสียก่อน ในการใช้งานจริง คุณไม่จำเป็นต้องอ้างอิงแหล่งที่มา และสามารถใช้ในโครงการเชิงพาณิชย์ได้ ดังนั้น คุณสามารถใช้ภาพประกอบ/กราฟิกเวกเตอร์คุณภาพสูงปลอดค่าลิขสิทธิ์ที่คุณชื่นชอบสำหรับสื่อสิ่งพิมพ์ เช่น ใบปลิว/โปสเตอร์ การสร้างเว็บไซต์ โฆษณาอีคอมเมิร์ซ หรือการผลิตรายการทีวี!
สำหรับผู้ใช้ที่ยังไม่ได้เป็นสมาชิกธรรมดา คุณไม่ได้มาที่ illustAC เพื่อลงทะเบียนฟรีใช่หรือไม่
Brushes in Illustrator are defined as the objects that you color with or register to other things as strokes. Brushes are the particular part of art that, if registered to strokes, looks to be like traditional brush strokes. They are also used to register artwork in recreating or dispersed designs along a path. You can also use a paintbrush tool to try sketching with brushes. Brushes are helpful because they are not restricted to the brush tool's directions. You can choose any chosen way to register a brush.
There are various types of free illustration brushes provided by illustAC. illustAC has offered high-quality thousands of free illustrator brushes, and the download process is also way too easy. Therefore, if you search for high-quality free illustrator brushes, then illustAC is your destiny. It's a trustworthy site; as you can see, 7756500 people are using it, and the total premier members are about 95150 people.
Illustrator has five different types of brushes. illustAC is the right place to get high quality, royalty-free illustrator brushes, and it is trusted by many users, which shows their authenticity, artists outstanding performance, etc.
Scatter Brushes: The scatter brushes obtain the available vector art and spread it across a path. Brushes like these create natural textures like grunge brushes or sponges. illustAC is the right place to get free illustrator brushes within seconds or minutes as you desire.
Calligraphic Brushes: These brushes were planned to copy the look of brushes and pens. This kind of brush works for hand-lettering in Illustrator.
Pattern Brushes: The pattern brush allows you to manage every angle's working, including corner angles and the right and left ending point. If you cannot find correct free illustrator brushes, then illustAC is your answer. The download process is also way too easy. A search filter is also available to search for their desired shapes, sizes, or colors of free Illustrator brushes vectors.
Art Brushes: Art brushes contain a vector and enlarge it across a line. These brushes work well for watercolor brushes, pencil brushes, pen brushes, etc. But if they are expanded or flattened too much, you can get unsteady outcomes.
If you are searching for eye-catching free illustrator brushes, then illustAC is the right place for you. illustAC is a part of AC works specially made for those designers and illustrators who love working with flat illustrations, vectors templates, or clipart to download and share their work. illustAC have about seven million registered users to date, and every day, their users are increasing.
illustAC provides hundreds of free illustrator brushes and has search filters available. You can get the required shapes, sizes, and colors free from Illustrator brushes through search filters within seconds or minutes. Some of the most popular free illustrator brushes of ilustAC are:
Scatter brushes are instinctively named. They scatter a pattern with a path. Thinking about a leaf-blower being pushed across a lawn gives you a sense of the chaos you can make using a scatter brush stroke to make the path of objects. To date, illustAC has provided about 23 free illustrator brushes to download.
Currently, illustAC provides about 127 free hair illustrator brushes. Since illustAC is trusted by millions of its users today, if you search for free Illustrator brushes, don't doubt and look at illustAC—various illustrator brushes like a hairbrush, floral brush, paintbrush, etc.
illustAC offers more than eight hundred paintbrush illustrators for free. They also have a search filter to get the required shapes, sizes, and colors of paintbrushes illustrators you want. For downloading any paintbrush illustrations for free, click the picture and see the download button. To make your design look better and if you don't know where to get the free illustrator brushes, illustAC is your answer.
Grab yourself an unfastened set of the following marker illustrator brushes. With the availability of various textures, this straightforward yet varied set will help you personalize your layout down correctly the way you need it to be. Authentically sourced from pens, free illustrator brushes ramify nib styles and sizes, from thin outlining strokes to a little thicker.
With a simple one-click on, you can give your clean and crisp vector paths the advent of a homemade doodle with the subtle irregularities produced with the aid of ink bleeding into the paper. Besides this, illustAC allows you to choose from, inclusive of brief, long, alternative, and messy strokes. You should follow the brush to any route created with the brush tool, Pencil, or Pen tool, and easily exchange the scale with the aid of changing the stroke weight to switching the stroke weight to know the correct line style.
You can provide an old carved and engraved appearance with the help of shaving brushes that are hand-drawn line patterns in horizontal, vertical, diagonal, and cross-hatched orientations that are used to shade your digital drawings. Once they are scanned from handmade pen strokes, they have been processed into free illustrator brushes that perfectly repeat along paths of any period without stretching or deforming. Now open the brushes file from the brushes panel menu into Illustrator and choose 'Load Brushes.
If you want to exchange the brush's dimensions, adjust the stroke weight to increase in size or grow. The brush stroke will possibly expand past the desired shading place. One appeals to trim to create it to measure with the aid of drawing a full shape and setting to make the extra quantities invisible as a clipping mask. Another way of protecting the method is by adding an Opacity Mask to the course, then painting over the unwanted areas to hide the excess with a Blob brush.
You can download the illustrator files by clicking on the images and opening them in Illustrator. Use your Brush tool(B) to create attractive shapes and choose the brush you want from the brush panel. For different and unexpected results, try to scale the stroke of the brushes. You can also save the brushes for later use so that you don't need to open the Illustrator file every time, and it saves your time and effort. For storing, click the left pop-up menu of the Brush panel and select the Brush libraries menu> Save Brushes. Also, name your brushes on the brand-new report, click on the pop-up menu and choose the store's settings according to your choice.
Authentic linocut and woodcut illustrations need a ramification of specific tools, endurance, and skill. Still, there's a way to produce fun and interesting similar artworks patterns but with the protection internet of the Undo button. illustAC provides you with high-quality royalty-free illustration brushes.
To construct your illustrations with sensible techniques, pick out brush shapes like tapered shapes, texture fills, and edges shading but in no time and without the unfulfillment of making any mistake. The other way is to open the document will appear the series of paths with each brush already applied, which can also be copied into another document to switch into the Brushes panel from the brushes. You can use the brush tool to modify your drawing paths from the library by choosing a brush style. The dimension of the brush can be modified using the stroke weight.
Dry brush strokes help develop distressed designs with a handmade look. You can download this free set of vector free illustrator brushes from illustAC. Each brush stroke is used for two purposes, like a standalone graphic to your designs or made with the brush or pencil tool that features the rough texturing in your artwork.
They have been made utilizing painting wispy strokes with a paintbrush, and then the outcomes are scanned and vectorized to make valuable vector resources. Those kinds of brushes are used chiefly for developing authentic hand-painted consequences on your artwork. To fast freehand textured highlights and shadows to your illustrations, notice them with the brush tool.
Being a digital artist, you might constantly search for new ways of visually enhancing your illustrators; one of the most used methods is applying textures through brushes.
As we speak, there are more than thousands of brush packs available out there, but what if you find yourself where you have to create one of your own?
Well, the process of making custom brushes in Illustrator can sometimes be a real challenge and will require you to think differently outside of the box since there are multiple methods of achieving the same result. Remember that you will find a great selection of vector brush sets to pick for free illustrator brushes from illustAC. The ways of creating your brushes in Illustrator are as mentioned below:
To get the perfect stroke that you want, you need to decide the direction of a brush. You can create various custom brushes to help yourself in your work. You can also flip the brush horizontally or vertically to flip the stroke that it produces.
You need to create any shape you want to test your brush. Be confident that you have the stroke selected in the tools palette, and click on your custom brush in the Brushes palette to apply it in the shape you just created to see what you get. Custom brushes make it easy to get forms; otherwise, it will take hours to draw by hand. You can start using it whenever you like because you have created your meeting. Just adjust the stroke size to get the suitable effect/shapes.
There are different ways to use your illustrator brushes. You can also use the paintbrush tool to draw an applied path and apply your brush to a current approach. Follow the following methods to use your illustrator brushes:
Changing brush shape and color is an easy task, and you need to follow some steps, and it's done.


